
Aerial Stereoscopic 360 Video And Images For True Live-Action Virtual Reality (Part 2 of 3)
To continue this three part series, where in the first part we covered the Ricoh Theta S camera system, in this second part of the series we’ll show how we married two of these together to form up a stereoscopic VR rig, and the post-processing steps needed. In the third part we’ll cover what we did to take aerial VR 360 with it on a DJI Inspire 1 drone.
First, our camera “accessory tool bag” is quite elaborate:
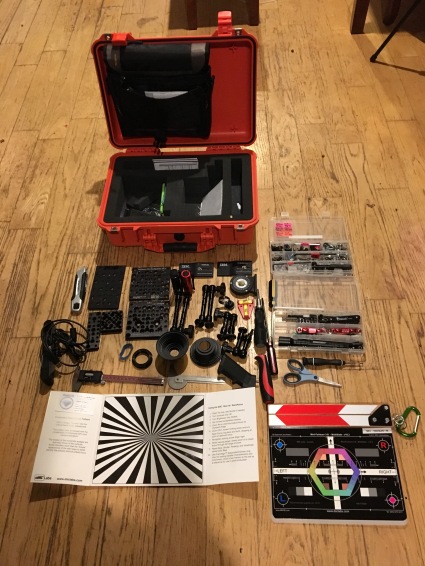
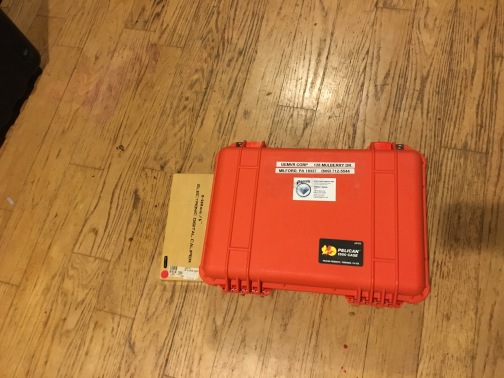
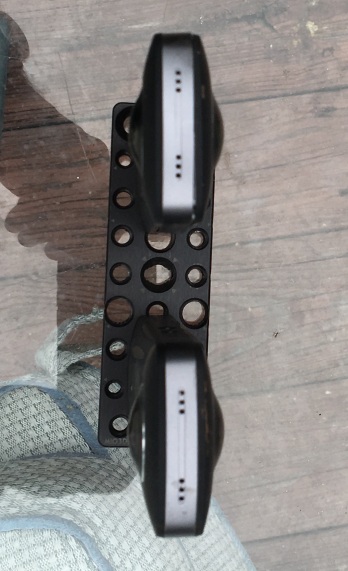
The most important thing to note here is that this is a customized extension of a Fairburn Multiplate Kit (available at http://www.mio3d.com) — Sean Fairburn puts together some great, very clever and well-thought-out kit. This kit is awesome for when you want to marry things together that normally wouldn’t go together, and when you want to experiment. We also added some tools, step rings, a bunch of Israeli arms/articulating arms and a focus chart. The focus chart is useful since we’re shooting at very high resolution — 5376×2536, more than 4K for each camera. We used a Fairburn 3×1 multiplate (the little plate at the bottom left) for what you’ll see next… and yes, it all barely fits in the case (except for the digital micrometer, it has its own case):
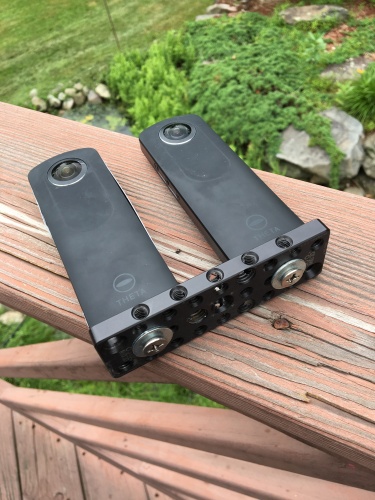
To set this rig up you need the 3×1 Fairburn multiplate and two 12/20 screws (provided in the kit, amongst many other things you’ll never think you need until you need them), and a Phillips screwdriver to put it all together, arranged like so:
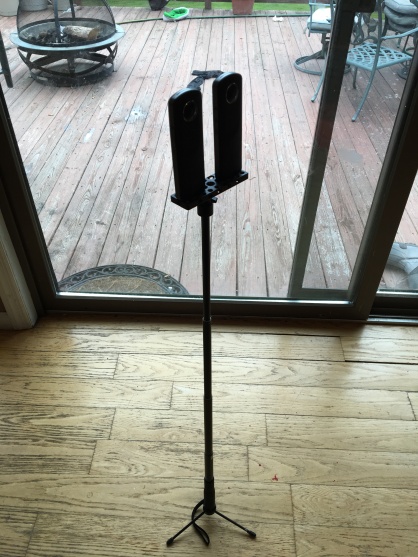
Now, with the mounting plate you can directly twist this on to any standard tripod mount or any other 12/20 — in this case, to show how light and flexible this rig is, we mounted it on a the selfie stick (Smatree® SmaPole Q3) mentioned in Part 1:
To take stereoscopic VR photos or video with this rig will require two phones or tablets, each connected to one of the two camera WIFI access points. I’d suggest using two of the exact same model phone so the app performance and latency is identical — because you’re going to need to hit the shutter button at the exact same time on both, whether doing timelapse still images at 16Mpel or video at 2Mpel. Mismatches can be corrected in post-production… up to a point. It’s better to match the settings, and shutter as much as possible.
Another interesting property of this rig is that it’s fairly forgiving of alignment — the individual cameras take care of most of the stiching and camera removal. However, lining up the cameras carefully with a caliper/micrometer pays off in that the amount of “other camera” each other camera “sees” can be minimized, which makes “rig removal” or inpainting in post production much easier:
One note about the monopod arrangement here — it’s a little top-heavy, so make sure that when setting the monopod up that it’s on a flat, stable surface. We made the mistake of attempting a midnight moonless night shoot, putting the monopod and plate rig in an elevated flower pot. The result was tragically predictable — the monopod tumbled about 8 feet to the ground, and landed with one of the cameras head-first taking the full impact. Thankfully the optics didn’t get scratched up so we were able to perform a little microsurgery and put Humpty Dumpty back together again:


Here is “first light” from the rig. You can view this on the GemVR channel on YouTube (along with other experiments) or the GemVR channel on VRideo.com if you have an Oculus Rift and the VRideo app. You don’t need a Google Cardboard nor an Oculus Rift — if you view this with just a computer or phone without other elaboration it will be monoscopic (but still cool). Be sure to set the resolution settings for Youtube to the highest allowable:
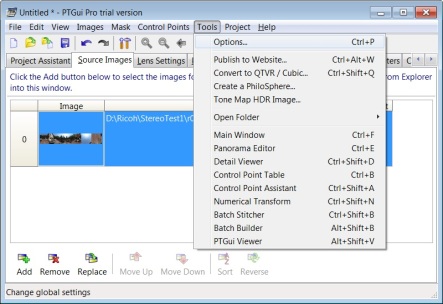
Now, two problems with this — you can still see the plate and mounting, plus the cameras are “seeing each other”. One can use Photoshop CC which has a great in-painting function, or use a free tool called G’MIC (http://www.gmic.eu). Since the rig removal occurs at the bottom of the equirectangular projection(s), before inpainting it’s best to convert to a cube map projection first — we used PTGui (http://www.ptgui.com):
Which netted the following cube-map projections:


Once in cube map form, rig removal and inpainting is easy (we used Photoshop CC’s context-aware inpainting in this case). Note the bracket, tripod kickstand legs, and shadow have magically disappeared:


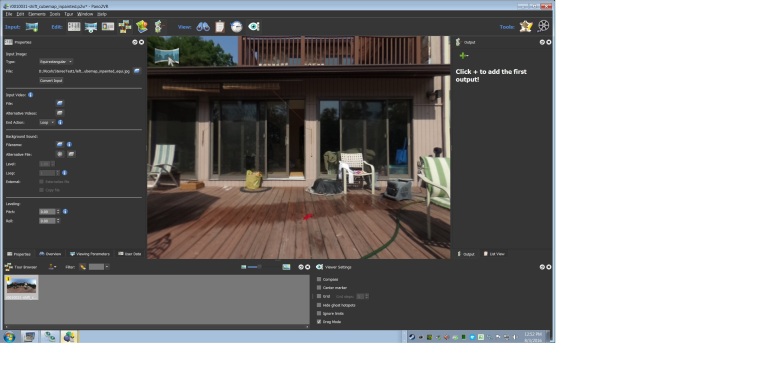
For video, there’s good news: the mask for the rig removal does not change from frame to frame so one can automate this process using Imagemagick and G’MIC, (which we’ll demonstrate in Part 3). Then we go back to equirectangular projection (PTGui won’t do this easily, so for this step we used Pano2VR (available at http://www.ggnome.com):
 Next, we create a stacked stereo (top-and-bottom, or TaB) video from these single left-eye and right-eye frames with the following ffmpeg commands, run in succession:
ffmpeg.exe -loop 1 -i left\left_inpainted_equi.jpg -c:v libx264 -t 15 -pix_fmt yuv420p -vcodec rawvideo Left.avi
ffmpeg.exe -loop 1 -i right\right_inpainted_equi.jpg -c:v libx264 -t 15 -pix_fmt yuv420p -vcodec rawvideo Right.avi
c:\ffmpeg\ffmpeg.exe -y -r 0.405 -i Left.avi -r 0.405 -i Right.avi -pix_fmt yuv420p -s 5376×5376 -filter_complex “[0:v][1:v]vstack[v]” -map “[v]” -pix_fmt yuv420p -vcodec rawvideo stacked.avi
This next one encodes it at a resolution and file format that Youtube will understand:
ffmpeg.exe -y -r 0.405 -i Stacked.avi -s 4096×2160 -pix_fmt yuv420p -vcodec libx264 -profile:v high -level 52 -crf 18 stacked.mp4
The final step is to use Google’s free “Spatial Media Metadata Injector”, available here. This tool allows you to mark the video as both 360 degrees, plus the fact that it’s stereoscopic.

Now it’s ready to upload to Youtube, VRideo, and other services. Here’s the final result:
Youtube (works with Google Cardboard, obviously):
https://www.youtube.com/watch?v=s_Y7k7y5ZqE
VRideo (works with Oculus Rift):
http://www.vrideo.com/watch/bbwj73ts
There are a few eye-rips here and there but it’s not too bad for a first pass shot.
In the next, final, third part of the series we’ll go over how we mated this rig to a DJI Inspire 1 Raw drone, in order to take aerial stereoscopic VR. In that case the “rig removal” includes the entire drone platform, which requires some elaborate inpainting!
